
Homemade caramel apples are a fun and delicious treat. They combine the sweet crunch of fresh apples with a rich, buttery caramel coating. Perfect for fall or anytime you crave a sweet snack, these treats are easy to make and great for sharing. Whether enjoyed at home or as gifts, caramel apples are sure to delight everyone.
Why Make This Recipe
Making homemade caramel apples is a delightful activity for people of all ages. First, they are a classic treat that brings back many fond memories. Think about the joy of biting into a crisp apple covered in warm, gooey caramel! It’s a nostalgic experience that can be shared with family and friends.
Second, making your own caramel apples allows you to customize them to your liking. You can choose your favorite types of apples, whether it’s tart Granny Smith or sweet Fuji. Plus, you can add toppings like nuts, chocolate chips, or sprinkles for extra flavor and fun.
Another reason to make this recipe is the simplicity of the process. With just a few ingredients and simple steps, you can create a treat that feels special. Lastly, homemade caramel apples make a wonderful gift! Wrap them in clear cellophane and tie them with a ribbon for a thoughtful present. Fun and tasty, these apples will surely bring smiles to everyone.
How to Make Homemade Caramel Apples
Making homemade caramel apples is straightforward. You will need the following ingredients: fresh apples, granulated sugar, butter, corn syrup, and vanilla extract.
Start by washing and drying your apples. This step is crucial because you want the caramel to stick well. Next, insert sticks or skewers into the tops of the apples.
In a saucepan over medium heat, combine sugar, butter, corn syrup, and vanilla. Stir constantly until the mixture comes to a boil. Keep boiling without stirring until the syrup reaches a soft ball stage, around 235°F (113°C). This process usually takes about 10 minutes.
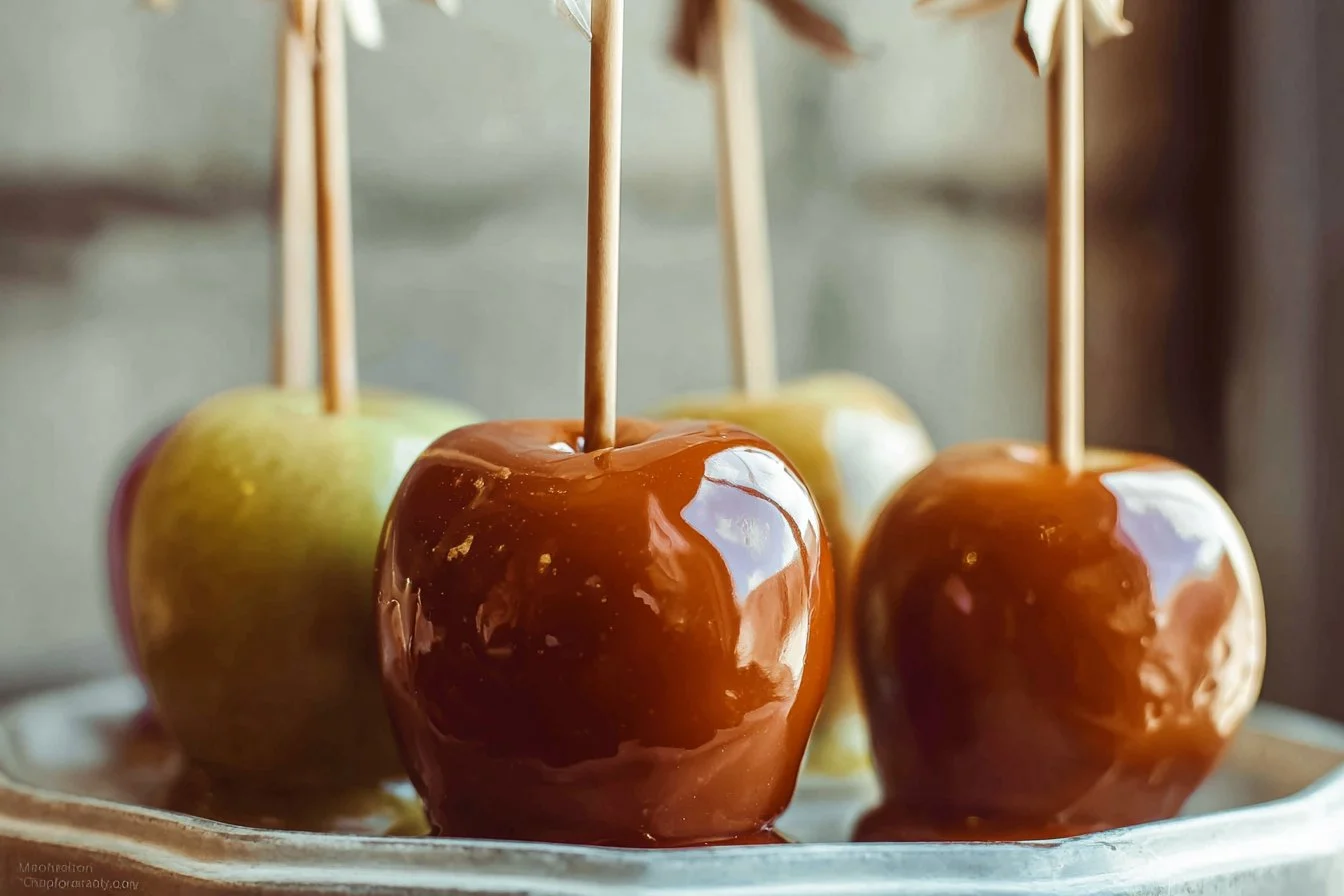
Once the caramel is ready, remove it from the heat and let it cool slightly. Dip each apple into the caramel, twirling to coat it evenly. Allow the extra caramel to drip off before placing the apples on parchment paper to set. Let them cool completely for about 30 minutes.
Your delicious homemade caramel apples are now ready for tasting or decorating as you wish!
How to Serve Homemade Caramel Apples
Serving homemade caramel apples is simple and enjoyable. You can present them in various ways to make them look even more appealing. For a neat presentation, place each caramel apple on a stick and set them upright in a decorative display or arrange them on a serving platter.
If you want to make it more fun, create a caramel apple station. Offer a variety of toppings like chopped nuts, mini chocolate chips, or colorful sprinkles. Let your guests dip and decorate their caramel apples as they prefer. This interactive experience adds excitement to serving the dessert.
You can also cut the apples into slices to make them easier to share. This way, everyone can enjoy a taste without having to eat a whole apple. Drizzle extra melted chocolate or caramel on top for an added touch. No matter how you choose to serve them, homemade caramel apples are sure to be a hit!
How to Store Homemade Caramel Apples
Storing homemade caramel apples requires a bit of care to keep them fresh. Start by letting the caramel apples cool completely at room temperature. This helps to set the caramel and will prevent it from sticking together.
Once they are cool, wrap each apple in wax paper or cellophane to keep them from becoming sticky. Alternatively, you can place them in an airtight container lined with parchment paper to avoid touching each other.
Store the caramel apples in a cool, dry place. If it’s warm, consider putting them in the refrigerator to keep the caramel firm. However, if you keep them cold, be aware that the caramel may become a bit hard.
Homemade caramel apples are best enjoyed within a week. After that, they can lose their freshness and flavor. If you have many leftover, sharing with friends or family is a great way to ensure they won’t go to waste!
Tips to Make Homemade Caramel Apples
To make the best homemade caramel apples, here are some helpful tips. First, choose firm and fresh apples for the best crunch. Apples like Granny Smith or Honeycrisp work wonderfully.
Ensure your saucepan is clean and dry before adding ingredients. Any moisture can interfere with the caramel’s cooking process. Use a candy thermometer for accurate temperature readings while boiling the caramel.
Stir the caramel gently to prevent air bubbles from forming, which can affect the texture. If you want to avoid a sticky mess, dip each apple into boiling water for a few seconds before coating them in caramel. This step helps the caramel adhere better.
Experiment with different toppings, but add them while the caramel is still warm to help them stick. Lastly, don’t rush the cooling process; let them set properly to ensure they look appealing.
Variation
Feel free to customize your caramel apples! You can add flavors like chocolate by melting chocolate chips and drizzling them over the caramel. You can also roll them in crushed cookies, toffee bits, or even sprinkle sea salt on top for a salty-sweet treat.
FAQs
Q: Can I use any type of apple for caramel apples?
A: Yes, you can use any firm and crunchy apples, like Granny Smith or Fuji.
Q: How long can I store homemade caramel apples?
A: Homemade caramel apples stay fresh for about a week when stored properly.
Q: Can I make the caramel ahead of time?
A: Yes, you can make the caramel ahead of time and store it in the refrigerator. Just reheat it before dipping the apples.
Q: Can I use store-bought caramel?
A: Yes, using store-bought caramel is a great shortcut for making caramel apples.
Q: How do I keep my caramel apples from getting sticky?
A: Wrap them in wax paper or store them in an airtight container to prevent stickiness.
Homemade Caramel Apples
- Total Time: 45 minutes
- Yield: 4 servings 1x
- Diet: Vegetarian
Description
Delicious caramel-covered apples that are perfect for fall or any sweet snack craving.
Ingredients
- 4 fresh apples (Granny Smith or Fuji)
- 1 cup granulated sugar
- 1/4 cup butter
- 1/4 cup corn syrup
- 1 teaspoon vanilla extract
Instructions
- Wash and dry the apples. Insert sticks into the tops.
- In a saucepan, combine sugar, butter, corn syrup, and vanilla. Cook over medium heat, stirring constantly until it boils.
- Boil without stirring until the syrup reaches a soft ball stage (235°F/113°C), about 10 minutes.
- Remove from heat and let it cool slightly.
- Dip each apple into the caramel, twirling to coat evenly. Allow excess caramel to drip off.
- Place the apples on parchment paper to set and cool completely for about 30 minutes.
Notes
For added fun, set up a caramel apple station with various toppings like nuts and chocolate chips.
- Prep Time: 15 minutes
- Cook Time: 10 minutes
- Category: Dessert
- Method: Baking
- Cuisine: American
Nutrition
- Serving Size: 1 apple
- Calories: 320
- Sugar: 60g
- Sodium: 140mg
- Fat: 12g
- Saturated Fat: 7g
- Unsaturated Fat: 4g
- Trans Fat: 0g
- Carbohydrates: 50g
- Fiber: 3g
- Protein: 1g
- Cholesterol: 30mg
Keywords: caramel apples, fall treats, homemade desserts, sweet snacks